
How to Add Location to Photos Without GPS on iPhone/iPad
Photos on your iPhone or iPad sometimes have no location (GPS) data — for example screenshots, shared images, older imports, shots taken with Location Services off, or photos taken with a camera that does not record GPS and then added to your photo library. HashPhotos can manage those photos and help you geotag them so they appear correctly on the map and can be found by place.
This guide covers practical ways to add location:
- Set a location manually with Adjust Location
- Copy location from one photo and paste it onto others with Adjust Location
- Add location from a GPX file track
- Add location from an iOS Workout Route
- Estimate location from other photos taken around the same time
The track-based methods use HashPhotos’ Add Location from Track tool.
PRO Free tier limits: Adjust Location is single item only (up to 3 location bookmarks). Add Location from Track can process up to 10 photos at a time.
How to set location manually on iPhone/iPad photos
Use this when you know where a photo was taken and want to pick the place on the map, or apply a saved Location Bookmark. This works well for a single photo or a small selection you can place at the same spot.
- Open a photo in the viewer, or select photos in the thumbnails screen.
- Tap the on the bottom toolbar.
- Tap Adjust Location.
- Set the location on the map, or choose a saved Location Bookmark.
- Tap Adjust.
When Update Metadata is on, for image formats that support metadata, HashPhotos can write the new coordinates into the file’s location metadata. See the full steps in the Adjust Location guide.
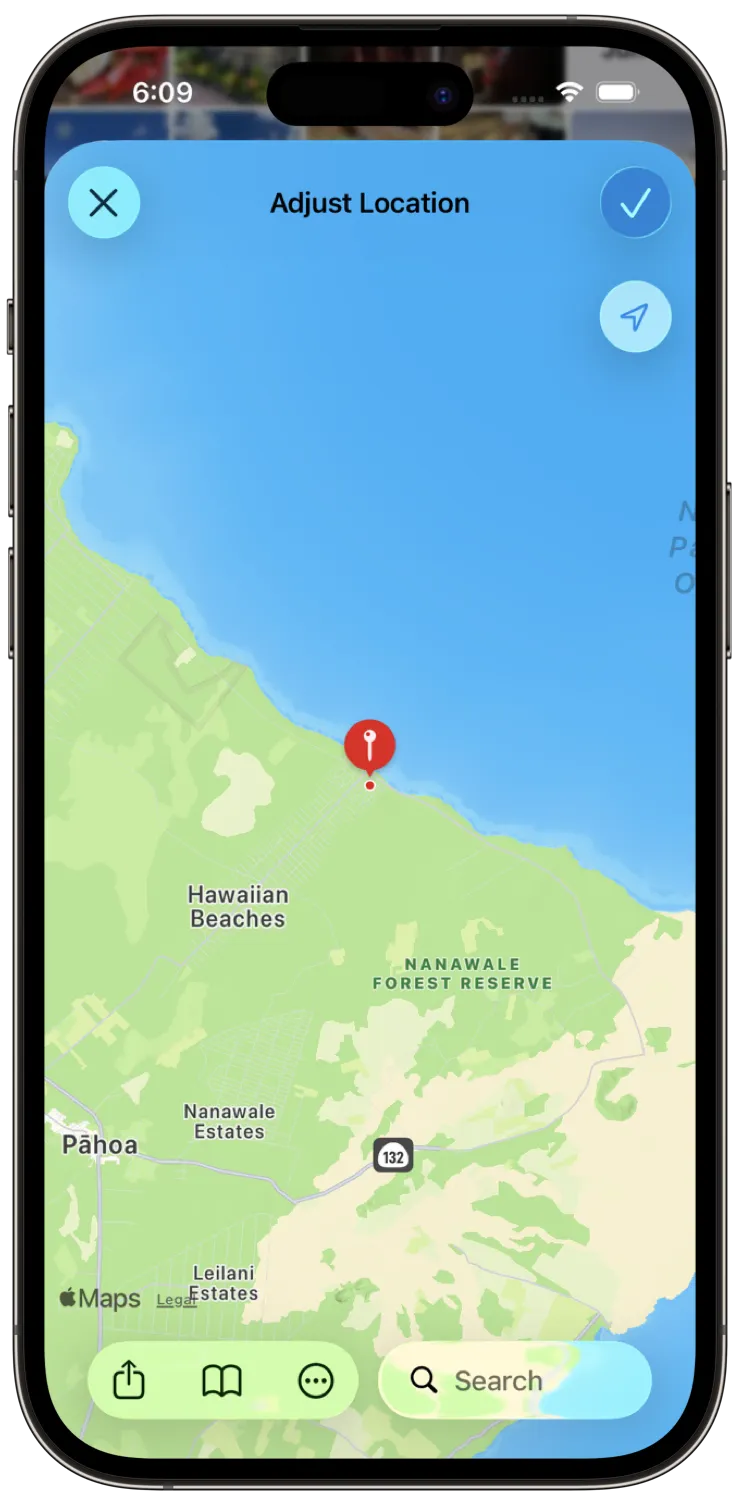
How to copy location from one photo and paste it onto others
When several photos were taken in the same place—and at least one of them already has the correct GPS— you can copy that location and paste it while adjusting the other photos. This is faster than re-picking the same point on the map each time.
Copy location from a photo
- Open a photo that already has the location you want in the viewer.
- Open the Information Summary panel (tap the i button, or swipe up on the photo).
- On the map, tap the … button and choose Copy Location.
Paste location onto other photos
- Open another photo in the viewer, or select the photos that should get the same place.
- Tap the on the bottom toolbar.
- Tap Adjust Location.
- On the map, tap the … button and choose Paste to apply the copied coordinates.
- Check the pin on the map, then tap Adjust to save.
Copy/Paste Location works with HashPhotos and is designed for good compatibility with location data used by Apple Photos. For full Adjust Location options, see also Location Bookmarks when you reuse the same places often.
How to geotag photos from a GPX file on iPhone/iPad
A GPX file is a common track format from hiking apps, running watches, mapping tools, and GPS loggers. If you recorded a route while you also took photos (even on a different camera), HashPhotos can match each photo’s date and time to the track and add the calculated GPS coordinates to photos that are missing location data.
This is often the best option when you want to geotag photos from a travel, hike, or road-trip track.
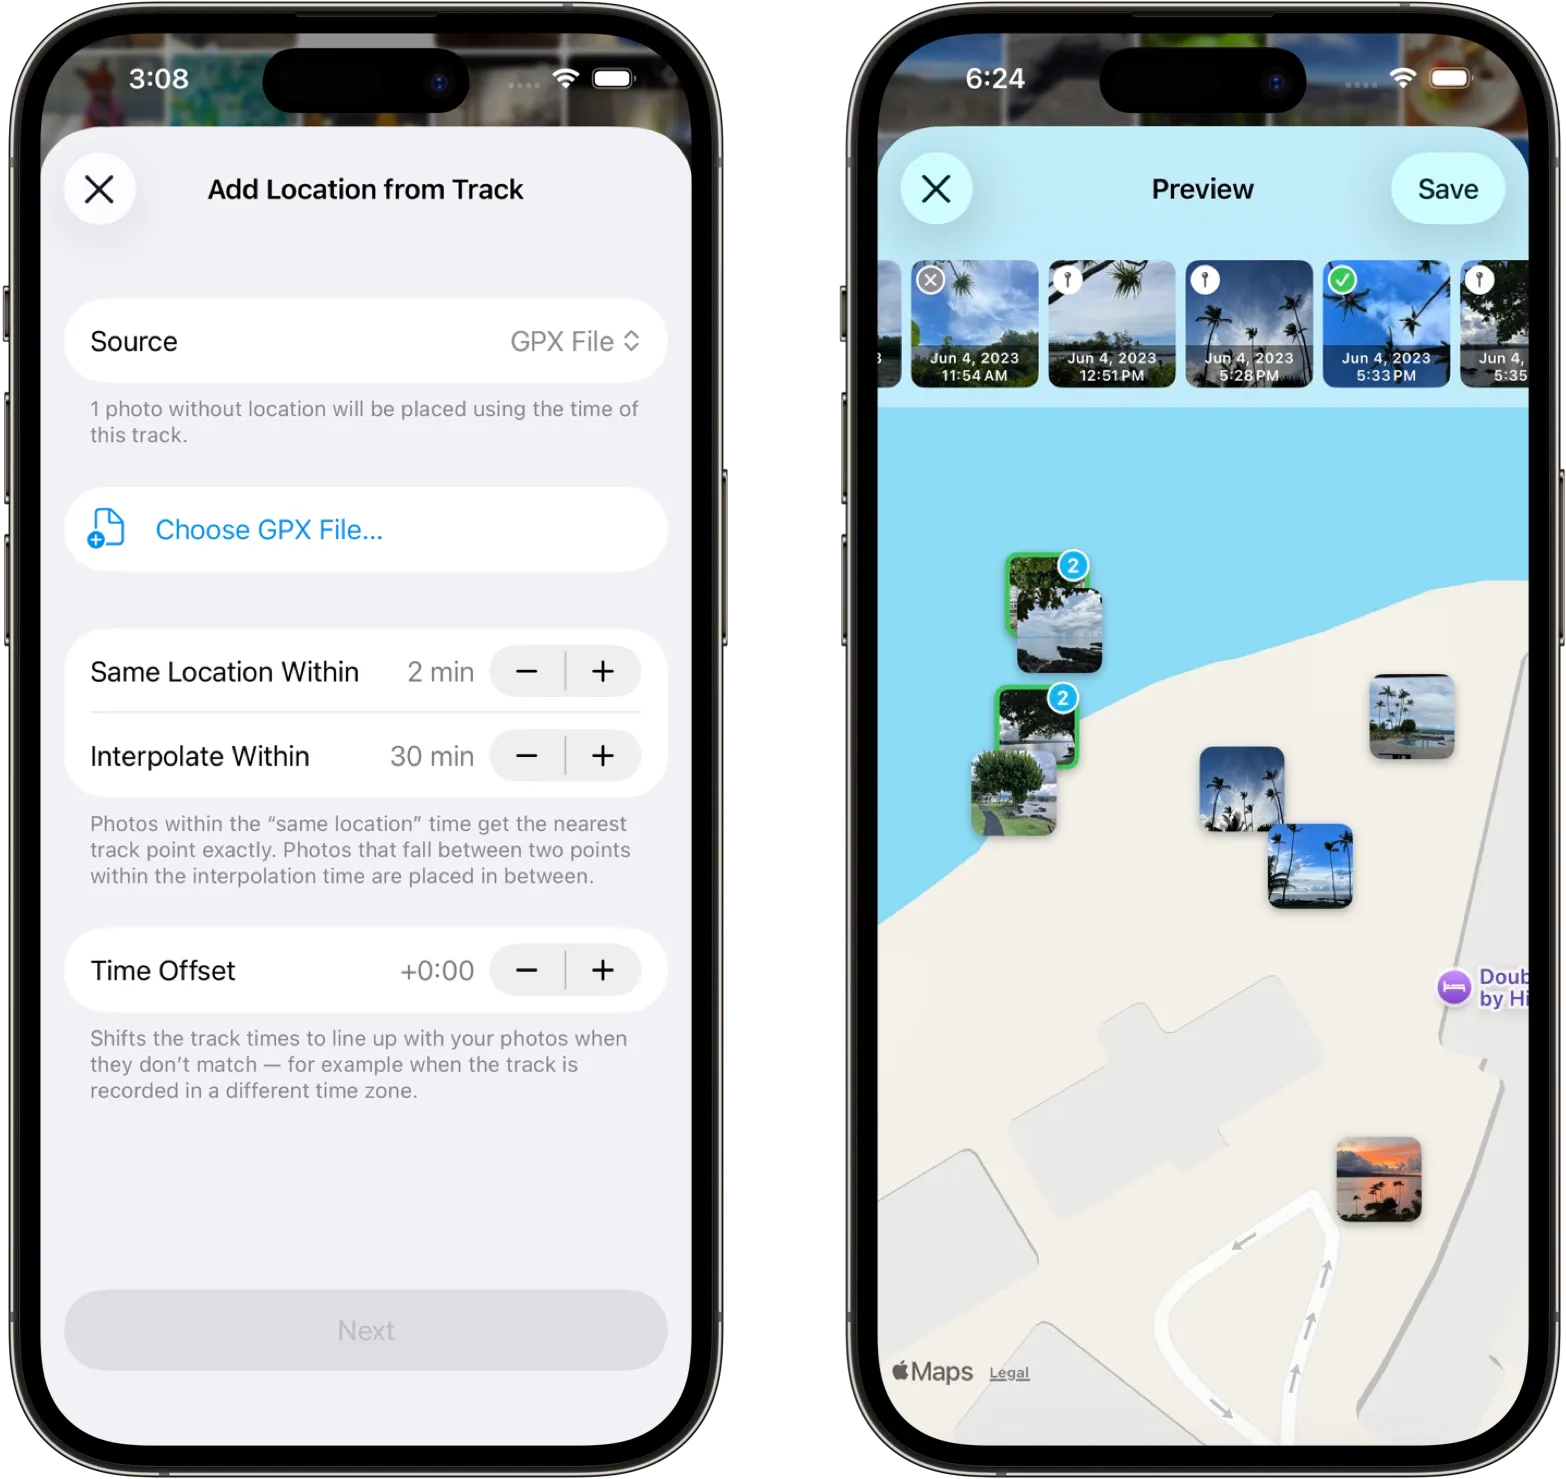
- Put the GPX file where iOS can open it (for example the Files app, iCloud Drive, or Downloads).
- Open a photo in the viewer, or select photos that need location data.
- Tap the on the bottom toolbar.
- Tap Tools > Metadata > Add Location from Track.
- Choose GPX File as the location source and open your track file.
- Preview the calculated positions on the map. Touch and hold a thumbnail if you need to exclude a photo or confirm a location.
- Save the calculated locations.
Photo times should line up with the track timeline. If locations look wrong, check time zone and the photo’s date/time first (see Adjust Date/Time). Full UI details: Add Location from Track guide.
How to add photo location from an iOS Workout Route
If you recorded a walk, run, cycle, or other outdoor activity with the Apple Fitness / Workout features (or a compatible app that saves a workout route to Apple Health), HashPhotos can use that Workout Route as the track to geotag photos taken along the way.
This is useful when you want to add GPS to photos taken during a workout without exporting a separate GPX file.
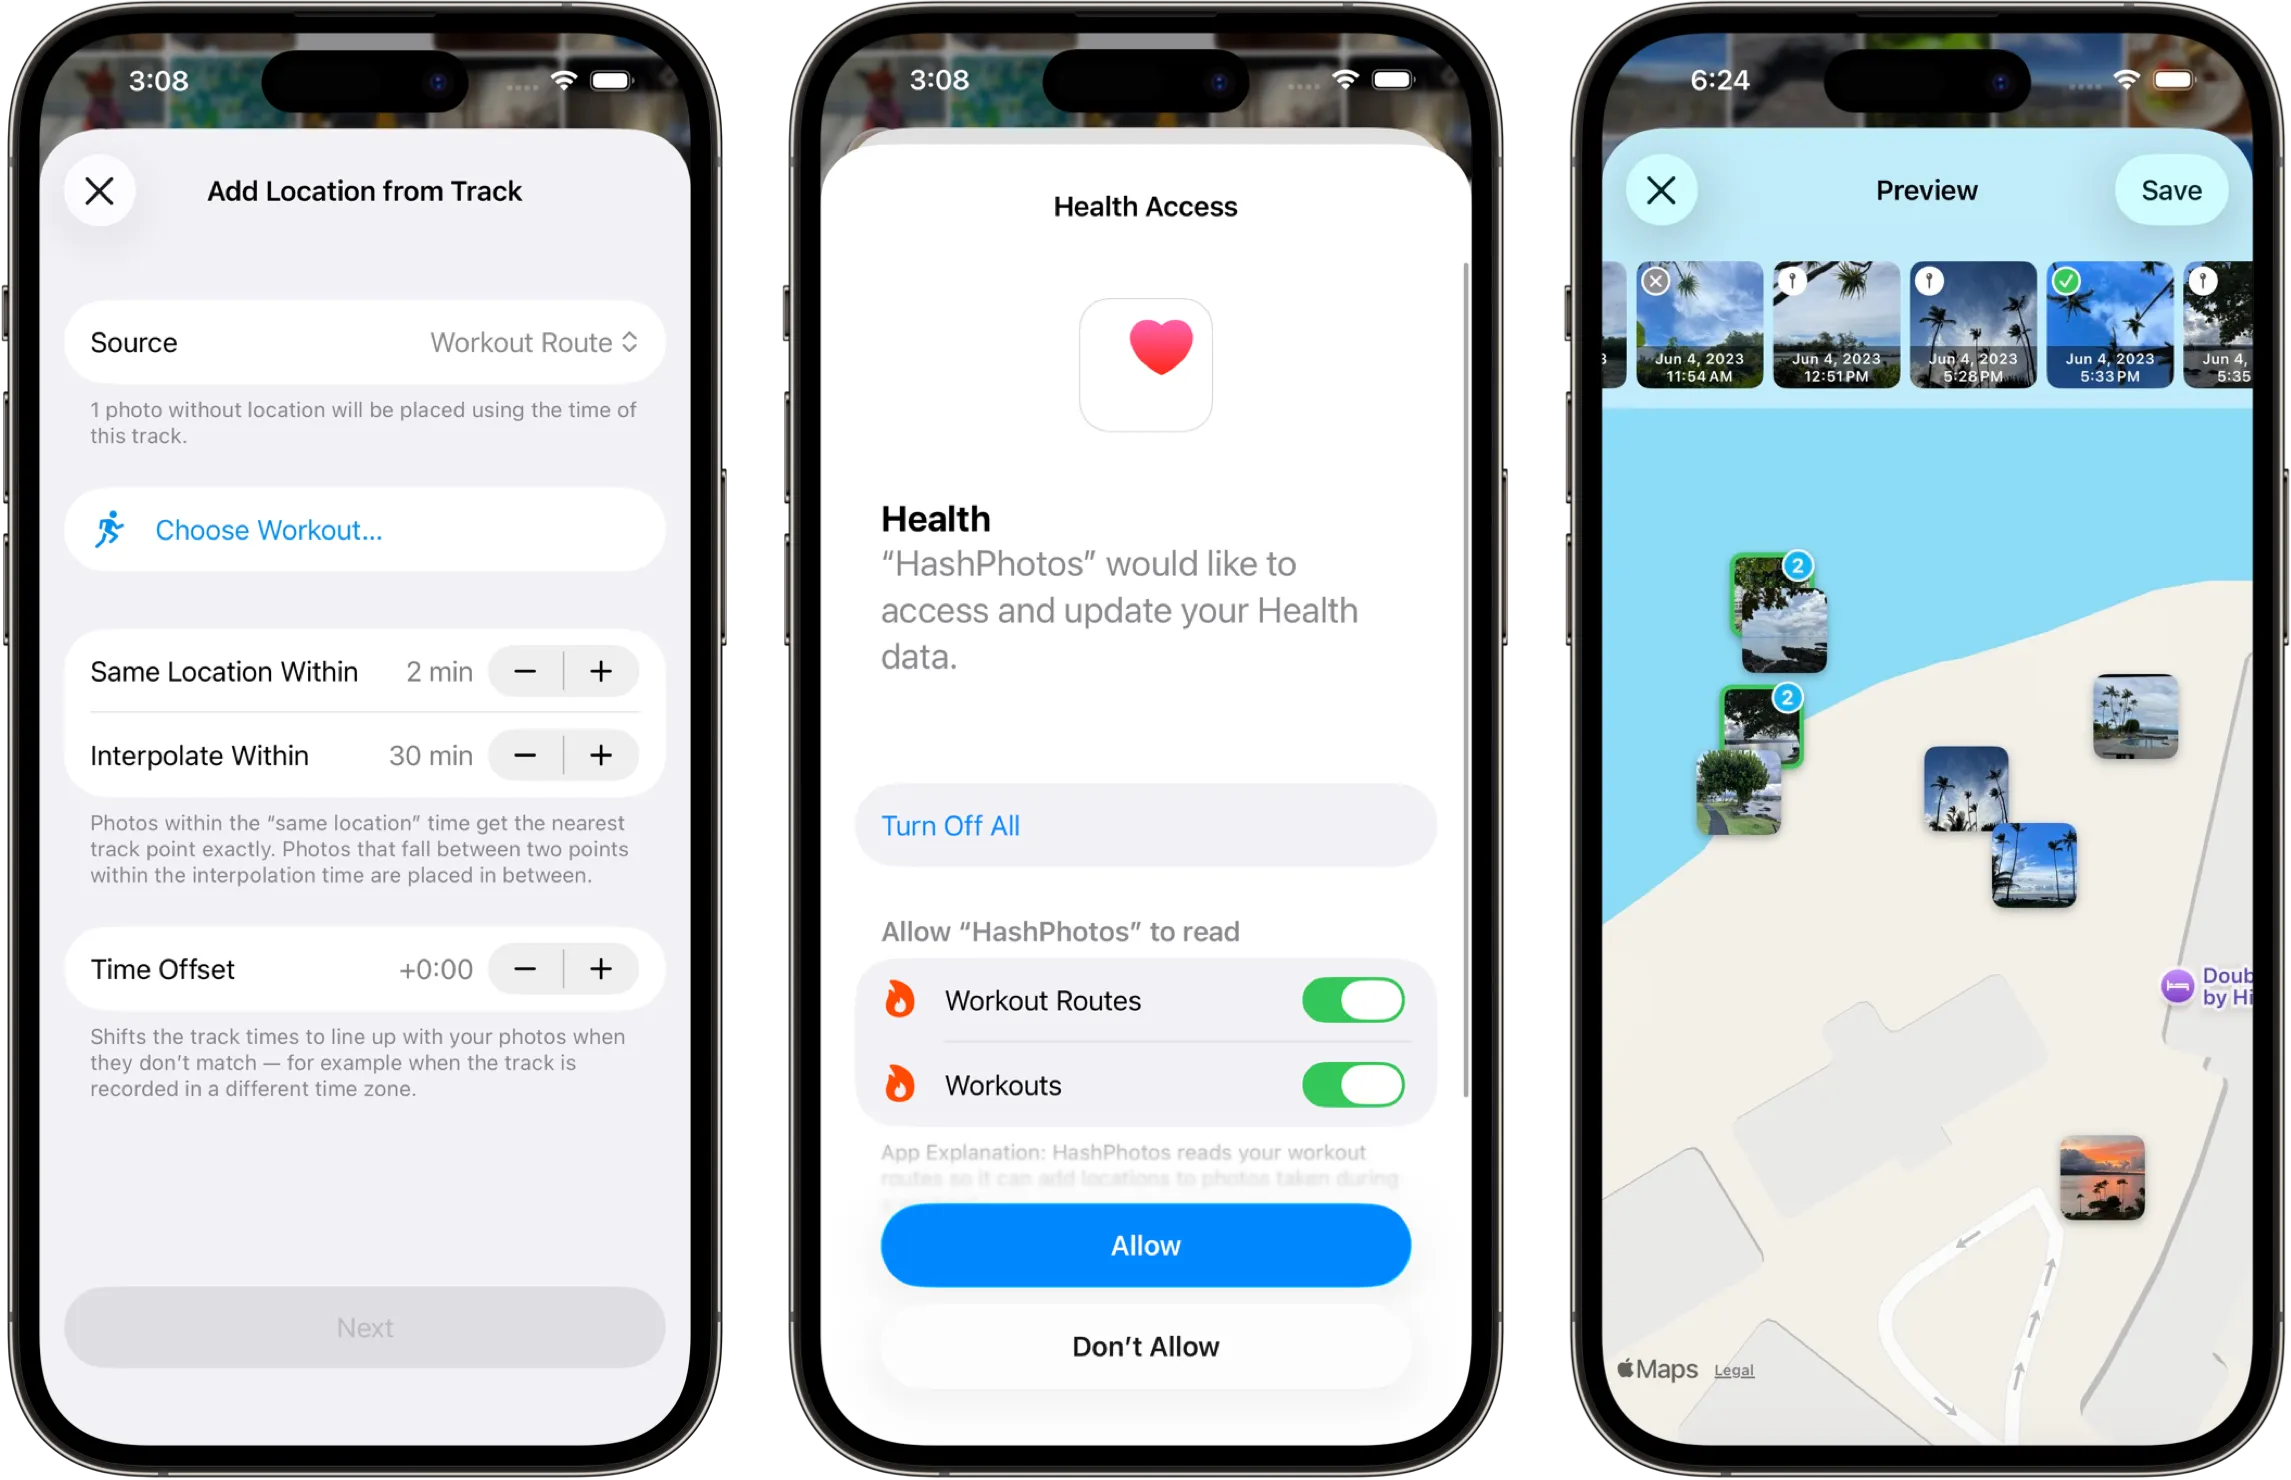
- Make sure the workout that includes a route is available on the device (Apple Health / Fitness data for that day).
- Open a photo in the viewer, or select photos missing location data.
- Tap the on the bottom toolbar.
- Tap Tools > Metadata > Add Location from Track.
- Choose Workout Route as the location source and pick the matching workout.
- Preview locations on the map, then save.
Allow HashPhotos Health / workout related access if the app asks for it so it can read route data. See also: Add Location from Track.
How to add location using nearby photos from a similar time
Sometimes only some photos in a burst, trip, or album already have GPS (for example a few shots from the phone while others came from another camera or a transfer). HashPhotos can infer location for photos without GPS by using timestamps together with location data from the photos you selected that already have coordinates.
This is ideal when you want to fill in missing locations based on other photos taken around the same time, without a GPX or workout.
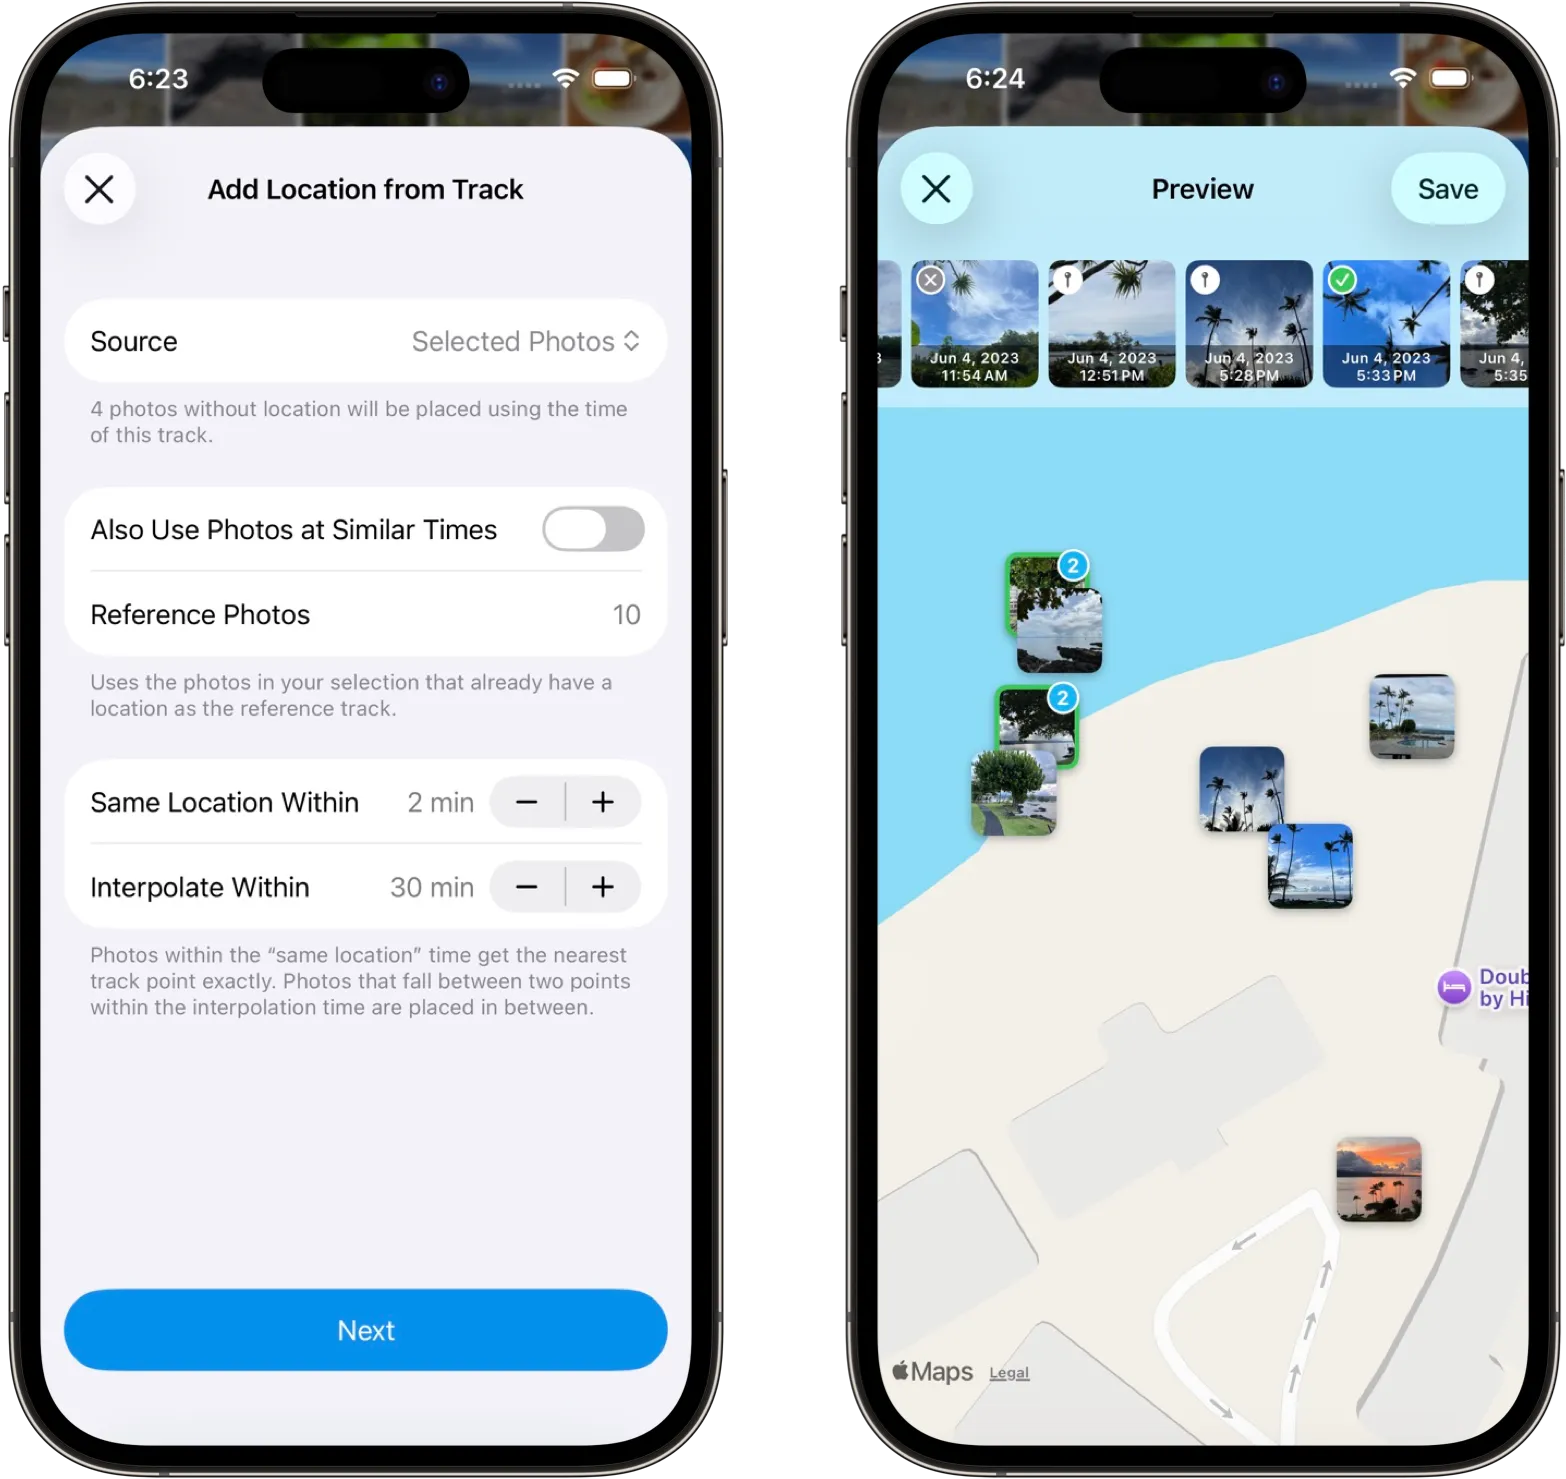
-
Select both:
- photos that already have location information, and
- photos that are missing location but were taken around the same period.
- Tap the on the bottom toolbar.
- Tap Tools > Metadata > Add Location from Track.
- Choose Selected photos as the location source.
- Preview results. Status icons on each thumbnail show whether location already existed, was calculated, or could not be determined (see the guide preview notes).
- Save when the map preview looks right.
Better results come from selecting a continuous time range with accurate capture times. Fix wrong clocks first with Adjust Date/Time if needed.
Tips for accurate geotagging
- Match time zones and capture times to the track or workout. A camera clock that is hours off will place photos in the wrong segment of the path.
- Review the map preview before saving. Exclude or override individual photos with thumbnail touch-and-hold actions.
- After saving, open Information Summary or the map view to confirm locations.
- For a deeper UI walkthrough, read the feature guides: Adjust Location and Add Location from Track.